Box joints are a time-honored and effective way to strengthen the corners of
your casework, boxes and drawers. All of those interlocking pins and slots
contribute lots of surface area for glue, so you're sure to produce joints that
will last. And, the organized pattern of face and end grain creates an
eye-catching geometry, especially if you build your project from contrasting
wood species.
An indexing jig on the router table makes them easy.
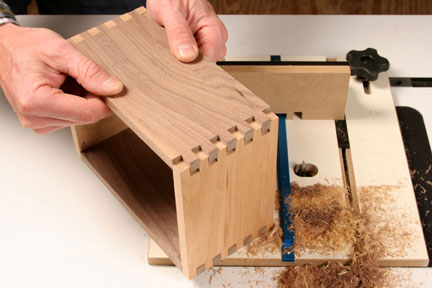
Making box joints isn't difficult on either the table saw or router table — we'll use the router table here — but you have to make them within precise tolerances so the pins and slots fit together properly. That requires a simple jig with a key to index the slot spacing. As Photo 1 shows, you can either purchase a box joint jig or make your own from a piece of scrap wood fitted with a wooden key and screwed to a miter gauge. In either case, the size and location of this key, and its spacing from the router bit, are what establish your box joint pattern. For this custom eZine, we'll use Rockler's Box Joint Jig, which mounts in the miter slot of a router table, to demonstrate the technique.
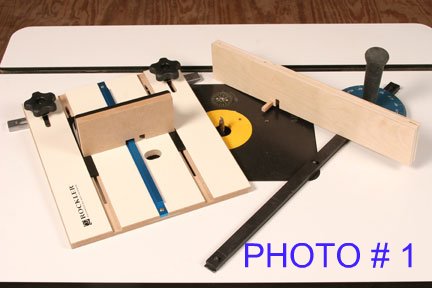
Step 1: Rockler's jig comes with three aluminum indexing keys, in 1/4-, 3/8- and 1/2-in. sizes. They're interchangeable on the jig and fit into a dado. Here, we're mounting the 3/8-in. key to match a 3/8-in.-dia. spiral upcut bit that we'll use to cut the joint slots (see Photo 2). If you build a miter gauge-style jig instead, make the wooden key the exact thickness of your bit's diameter and long enough to pass through the scrap fence and your project workpieces.
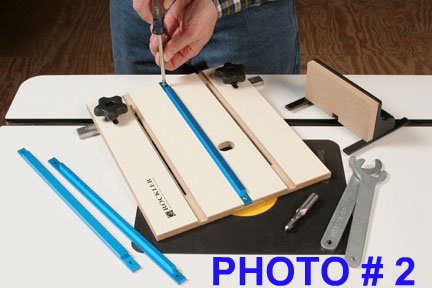
Step 2: Install your router bit, and raise it until it's slightly proud of your workpiece thickness (see Photo 3). This way, the pins will protrude a tad in the finished joint so you can sand them flush. Since workpieces rest on a base on Rockler's jig, the bit height must account for the base's thickness, too.
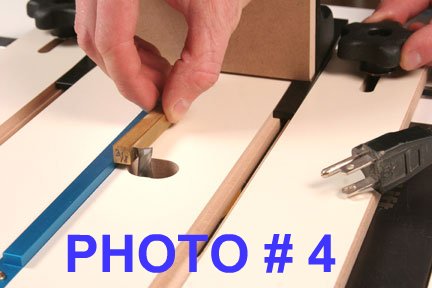
Step 3: Adjust your jig so the distance between the edge of the bit and the indexing key matches the bit's diameter. This way, the space between them establishes the pin width. In Photo 4, we're using a 3/8 x 3/8 brass setup bar to set the gap precisely. It's crucial to make this adjustment carefully so your pins and slots are neither too loose nor too tight. Tighten the jig base in the miter slot — or fasten your shop-made jig to your miter gauge with screws — to lock the setting.
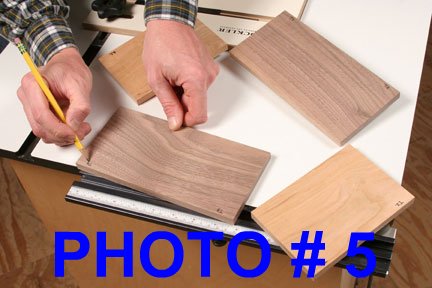
Step 4: Cut your box joint parts to size. Typically, box joints are laid out so the edges of each joint end in full pins on one of the two workpieces. So, as you determine the width of your parts, count out the pin-and-slot pattern. Make sure the part width will create a visually balanced joint. Mark the top inside corners of each joint to keep their orientation clear as you rout the parts (see Photo 5). BELOW
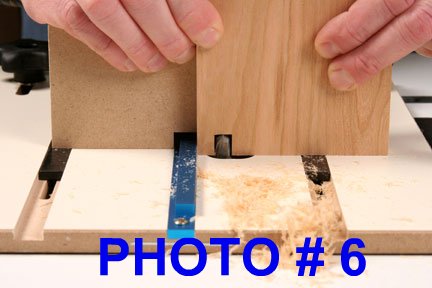
Step 5: To mill the first joint, start the pattern using a workpiece that will end up with pins on both outside edges. Set the corner you marked as "top" firmly against the jig's indexing key, and support it from behind with the moveable sled (or miter gauge fence for a shop-made jig). Rout the first slot (see Photo 6). Below
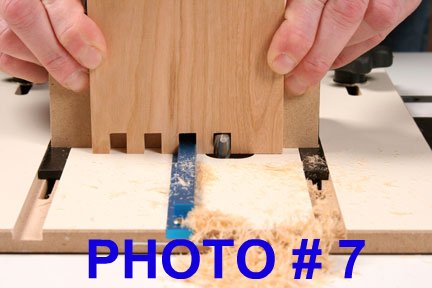
Step 6: Mill the rest of the pins and slots across the workpiece by slipping each new slot over the key to create the next pin and slot (see Photo 7). Make sure to press the workpiece down fully over the key each time to ensure that the slot depths will match.
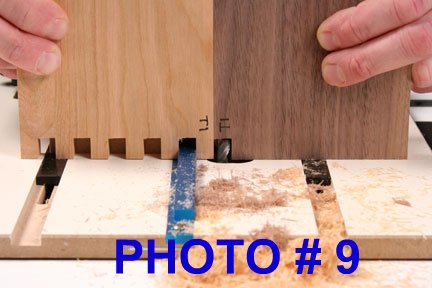
Step 7: Flip the first workpiece to the other face, and position the first slot you cut over the indexing key. Set the mating workpiece against the first with their top corners touching. In this configuration, the mating part will have slots along its edges instead of pins to form the mirror-opposite pattern. Rout the first slot on the mating board (see Photo 9).
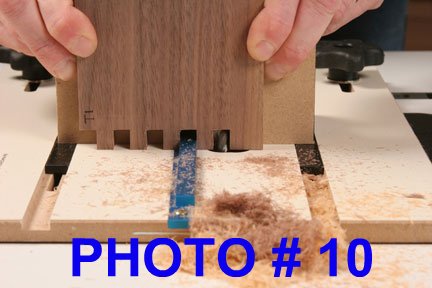
Step 8: Cut the remaining slots on the second board (see Photo 10). If you made your cuts carefully, it should end in a full slot. Slip the first joint together to check its fit. The pins and slots should mesh together without force or gaps. Then repeat Steps 5 through 8 to rout the other three joints.
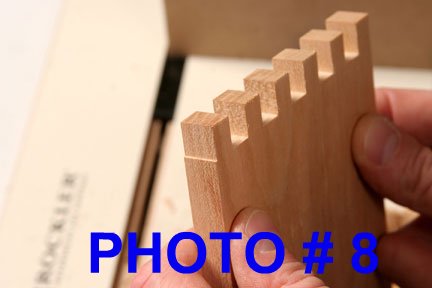
Troubleshooting tip: If the router bit leaves a shallow lip next to the last pin (see Photo 8), your workpieces are slightly too wide. Joint or rip this lip away, and adjust the width of the remaining three workpieces to match the first board.
With careful setups and routing, your box joints should be ready for glue-up right from the router table.