By George Vondriska
Almost every cabinet I build, whether it's kitchen cabinets, bookcases, or an entertainment center, calls for adjustable shelves. There are a variety of great ways to make holes for adjustable shelves, from the drill press to hand-held drilling to dedicated line-boring machines. I wanted a system that was faster and more accurate than a drill press or hand-held drill could provide, but less expensive than a dedicated line-boring machine. My adjustable shelf hole jig is the solution. Combined with a plunge router, equipped with a guide bushing and 1/4-in. straight bit, this jig makes fast work of boring shelf holes. Thanks to the high speed of the router the hole edges are always crisp and clean, even in fragile veneered sheet goods.
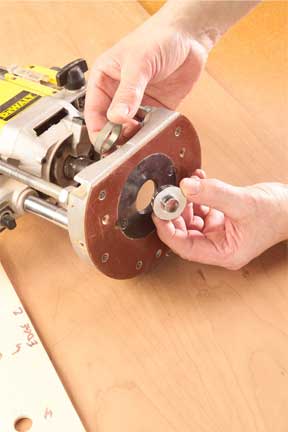
Photo 1 (Mike
Krivit)
A template guide bushing provides perfect alignment between
the router and adjustable shelf hole jig.
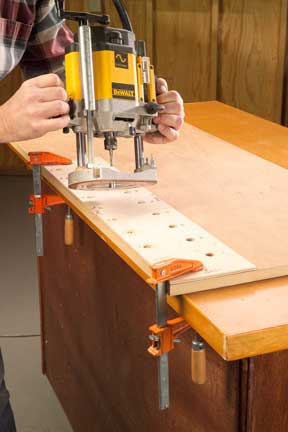
Photo 2 (Mike
Krivit)
Clamp the jig to your case side, aligning edges and ends.
Punch the shelf holes by plunging a 1/4-in. straight bit through the jig and
into the side.
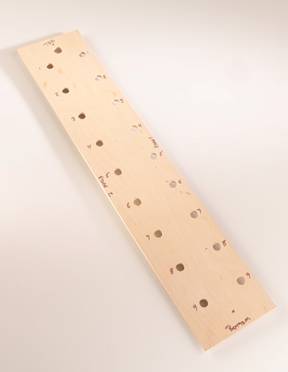
The Jig
This jig is simple to make. I used 1/4-in. thick
Baltic Birch plywood. Baltic Birch is a great choice for jigs since it's stable
and durable. I use a piece 6-in. wide and 30-in. long for this jig. The holes
are bored on 3-in. centers up the length of the jig. They're 1-in. on center
from one edge, and 2-in. on center from the other edge (more on that later).
Drill the holes using a fence on your drill press to insure the holes are a
uniform distance from the edge. Spacing from hole to hole doesn't have to be
absolutely perfect. The holes in my jig are 5/8-in. diameter, matching the size
of a template guide bushing I commonly use for this and other jigs in my shop,
Photo 1. The 5/8-in. diameter isn't critical, but the inside diameter of the
guide bushing you use must be larger than 1/4-in (so the router bit clears).
Once the jig is cut to size and the holes are drilled, label the jig. Mark one
end as the top, the other as the bottom. Number each of the holes, and mark the
edges as Edge 1 for the 1-in. set back and Edge 2 for the 2-in. set back. Label
both faces of the jig identically.
Getting Bored
Using this jig is dirt simple. Clamp it to
your case side, aligning the top or bottom with the end of the side, and Edge 1
or 2 with the edge of the side, Photo 2. I use Edge 1, which centers the shelf
hole 1-in. from the edge, on face frame cabinets. I use Edge 2, which centers
the hole 2-in. from the edge, on frameless cases with inset doors. Insert a
1/4-in. bit into your plunge router. Don't forget to set the depth of cut on the
plunge router. You're making shelf holes, not ventilation holes. Holes should be
3/8-in. deep. Engage the guide bushing in a hole in the jig and plunge the
router to make the shelf hole. You may or may not need to use every hole in the
jig, depending on how far apart you'd like your shelves to be. That's why the
holes are numbered. Keep track of which holes you use. After completing one run
of holes flip the jig and align it with the opposite edge of the case side. The
edge you used for alignment in the first step, 1 or 2, must be the same edge you
use in this step. Make sure the end of the jig, top or bottom, is aligned
exactly the same way it was in the previous step. Use the numbers on the holes
to make certain you use the same series of holes each time. This jig will
provide excellent results. The most important aspect is that each time you clamp
it to your work you are consistent in how you align the jig edges with the case
edges. As long as you're careful with jig alignment you won't have rock and roll
shelves. A 30-in. long jig works great for most wall cabinets. If you regularly
make tall cabinets, like bookcases or entertainment centers, make the shelf hole
jig longer.